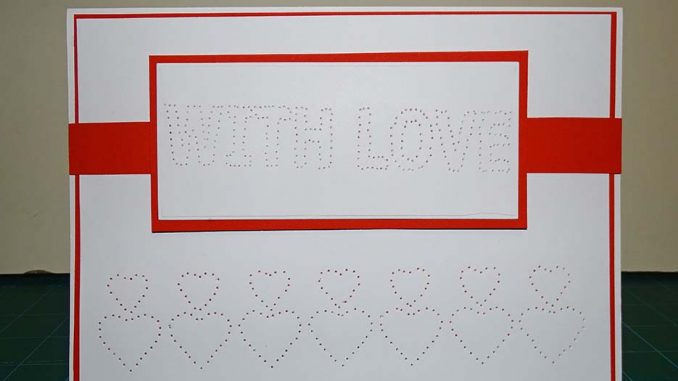
Enjoy paper piercing/ pricking in this step by step cardmaking tutorial. Paper piercing\pricking is a lovely technique in cardmaking where a design or motif is pierced with a needle tool( this can be the needle tool use in Parchment craft).
Materials needed
- Pricking template, image or stencil( You can print the one I made here Heart piercing for paper piercing card template)
- A4 cardstock- white x2, red x1,
- Pricking\piercing mat
- 3D sticky foam pad
- 1-needle tool (small size, for parchment craft)
- Liquid glue
- Guillotine
- Rectangle craft dies( optional if you can cut out shapes easily)
- Embossing/die-cutting machine( I use the crossover)

Instructions:
STEP 1: Score, fold and burnish one A4 white cardstock to form an A5 card.
STEP 2: Cut out Red cardstock( a little smaller than A5) and layer and glue it on the front of A5 white card.

STEP 3: Cut out white cardstock(a little smaller than the red cardstock). Â Place the white cardstock on the piercing mat and then place the heart-piercing template on the white cardstock and pierce the heart design using the 1-needle tool.
TIP: hold the 1-needle tool in an upright position(90-degree angle) when piercing the design.


STEP 4: Place a white card on the piercing mat and then place the “with love” piercing template on the white cardstock. Pierce the “with love” design as shown in step 3.
Place the rectangle-die on the pierced sentiment and cut out the rectangle shape

STEP 5: Glue the pierced “with love” topper to a red rectangular cardstock. Trim the red cardstock(topper) leaving a little border.

STEP 6: Glue the pierced heart white cardstock to the red cardstock (front of A5 card) in step 2.
Glue a strip of red cardstock to the front of the card as shown below.

STEP 7: Place 3D sticky foam pad at the back of the “with love” topper and place on the front of the card as shown below.


