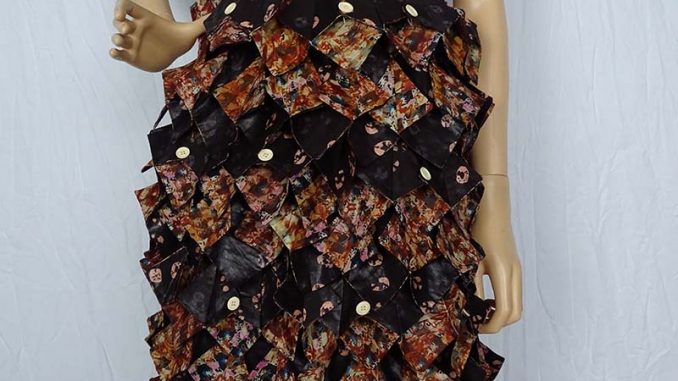
Here is my vintage dress for the Makeittoday dressmaker competition. Below is a step by step tutorial on how I made the dress. Squares were cut out of fabric using a fabric square on point die (from the 6inch Go qube) and the Accuquilt Go! Big die-cutting machine.

Materials needed
Sewing pattern of a gown- I used Vogue 2237 sewing pattern
Die -cutting machine- Accuquilt Go big (or fabric die cutting machine of your choice)
Scissors
Electric Iron
Fabric 100% cotton- 5 yds of multi-coloured, 5 yards of dark brown( for fold and stitch effect)
Fabric- 1/2 yards of Tan( light brown) for bodice of the dress
Fabric – 2yards base/skirt of dress (to anchor the fold and stitch squares)
Buttons (optional)
Rotary cutter
1 square on point fabric cutting die- Accuquilt
Sewing pins
Invisible zipper
Sewing machine feet- Invisible zipper feet, Open toe(standard feet)
Sewing machine

Instructions
Step 1: Place sewing pattern on fabric and cut.

Step 2: Sew the gown or dress according to the instructions of the sewing pattern. * I had to change the skirt/base of the skirt fabric because I needed more fabric for the squares.


Step 3: Sew the invisible zipper to the dress and then sew the lining to the dress to conceal the zip.


Step 4: Cut out squares from each fabric using the fabric die-cutting machine and the square fabric die.


Step 5: Take I square of each fabric design and then sew together on four sides (making each side of the square a different fabric). Leave a little opening for turning the inside-out of the square.


Step 6: Turn the square, inside-out. Iron the square fabric pieces. *Each side of the square has a different fabric.


Step 7: Place the Dresden ruler on the fabric square as shown in the picture below and then move the two (2) side-edges to touch in the middle. Iron the design to retain its shape ( the formed shape using the Dresden ruler).


Step 8: Sew one square/diamond to another on the folded side. This forms the fold ‘n’ stitch design. Add more square/diamond as needed to form the length that is needed. Iron the fabric to retain its shape/design.


Step 9: Pin the fold ‘n’ stitch fabric design to the dress. Let each layer\row overlap slightly so as to hide the base\skirt fabric. *Do not pin over the zipper.


Step 10: Sew the fold ‘n’ stitch design to the dress.

Step 11: Stitch buttons or beads to add finishing touch to the dress( optional).


